KiCAD
2015/05/24からのアクセス回数 17196
自分用のライブラリを作っておくと便利 †
Eagleでもそうでしたが、ライブラリーが充実しているCADでは多くの
部品が用意されている分、必要な部品を探すのに時間がかかります。
そこで、自分の目的に応じたライブラリを用意します。
私は、アイロンプリントを使ったプリント基板を使っているので、以下の2つを作成します。
- discreteLib: 昔ながらの抵抗やコンデンサー、コネクター、スイッチを配置する目的のライブラリ
- smdLib: 趣味の工作で使用する表面実装用の部品を集めたライブラリ(未着手)
参考にしたサイト †
ライブラリの新規作成 †
新規ライブラリの作成は、既存の部品のコピーからはじめます。
- ランチャーからSchematic library Editorを起動します。

- Part Library Editorで、Select working Libraryを選択(赤枠のアイコン)して、
Load component to edit from the current library(青枠)を選択し、コピーしたい部品を選択します。
電子工作用の部品discreteLibでは、最初にdevicesから必要な部品をコピーします。

以下では、Rを読み込んだところです。
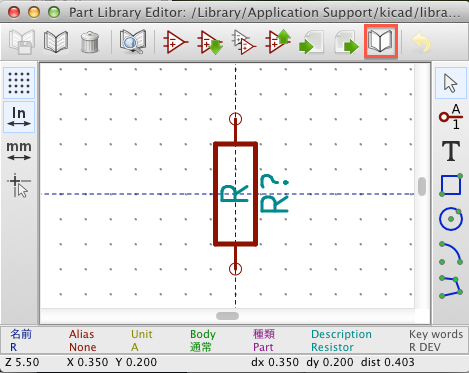
- Save current component to new library(上記の赤枠)を選択し、新しいライブラリ名(discreteLib)をセット
KiCADを再起動します。
- Part Library EditorのPreferencesのComponent Librariesを選択し、Component library filesに追加ボタンで追加します。
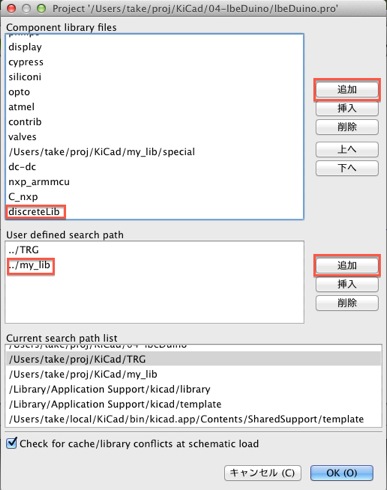
部品の追加 †
部品の追加手順は、ちょっとトリッキーです。以下の手順で部品を追加していきます。
- コピーしたい部品を含むライブラリをPart Library EditorのSelect working libraryアイコンで選択する
- Load component to edit from the current libraryでコピーする部品を選択する
- コピー先のライブラリをPart Library EditorのSelect working libraryアイコンで選択する
- Update current component in current libraryを選択する

devicesからのコピー †
devicesからコピーした部品は、以下の通りです。
- C
- CP
- CTRIM
- Crystal
- D
- D_Schottky
- FUSE
- Jumper_NC_Small
- Jumper_NO_Small
- LED
- Q_NMOS_DGS(2N7000用)
- Q_NPN_ECB(2SC1815用)
- Q_PNP_ECB(2SC1015用)
- R
- SPEAKER
- SW_PUSH
- TST
- VR
- ZENER
必要なマイコン †
私がよく使うマイコンとして、以下の2個を登録します。
- ATMEGA328-P
- LPC111x_DIP28
コネクター †
こちらもconnから以下のものをコピーします。
- conn_01x01〜conn_01x10まで
- USB_A, USB_B
新しい部品を簡単に作る †
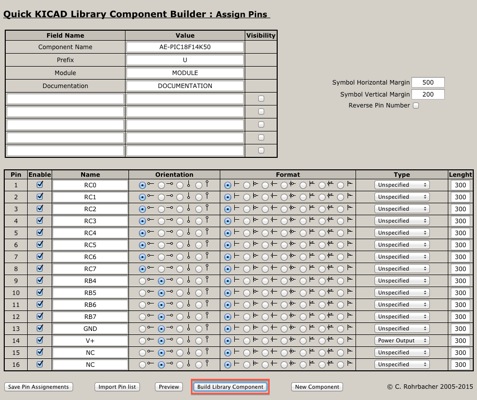
雑誌の付録基板や秋月の基板を部品と登録するときに、以下のサイトが便利です。
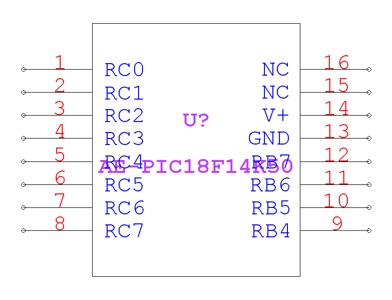
試しに秋月のAE-PIC18F14K50を登録してみます。
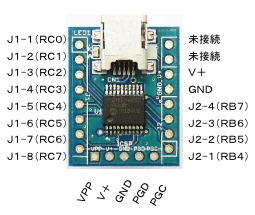
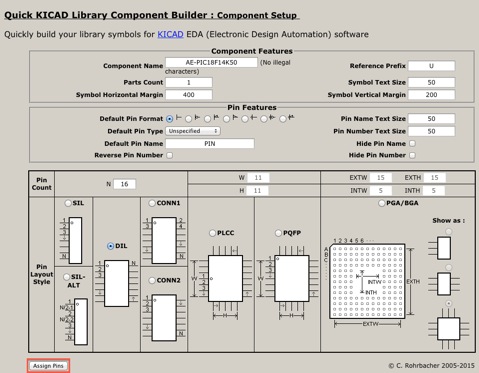
- ピンの名前、Typeを入力し、Previewで配置を確認します。
マイライブラリファイルへのインポート †
- import componentアイコンを選択して、ダウンロードしたAE-PIC18F14K50.libを指定します。

- Update current component in current libraryを選択する
出来上がったマイライブラリ †
コメント †
皆様のご意見、ご希望をお待ちしております。お気軽に問い合わせて下さい。
スパム防止に画像の文字列も入力してください。
![[PukiWiki] [PukiWiki]](image/pukiwiki.png)
![[PukiWiki] [PukiWiki]](image/pukiwiki.png)